
What to Expect During Major Home Roof Installations

A major construction project happening literally directly over your living space can be an incredibly stressful, noisy, and disruptive experience. For most homeowners, your house is your sanctuary, and the sudden arrival of heavy machinery, massive delivery trucks, and a large crew of workers can feel like an invasion of that peaceful space. It is completely normal to feel anxious about the process. After all, the structure protecting you from the elements is being torn open and rebuilt, exposing your property to potential weather risks and the inevitable chaos of a busy job site.
However, the vast majority of homeowner anxiety stems directly from the unknown. Without a clear timeline or a comprehensive understanding of the construction phases, it is easy to feel overwhelmed by the sudden influx of materials and the intense noise that accompanies the work. When you do not know what is supposed to happen next, every loud bang or unexpected delay can trigger unnecessary panic.
The purpose of this comprehensive guide is to provide you with a detailed, step-by-step roadmap of the entire installation process. By pulling back the curtain on the construction timeline, you can transform from a stressed bystander into an informed, proactive project manager for your own home. Knowing exactly what happens on day one versus day three allows you to proactively protect your property, prepare your family, and minimize disruption to your daily life. Let’s dive into exactly what you should anticipate from the moment you sign the contract to the final sweep of the driveway.
Prepare Your Home and Family for Construction Day

The success of a major exterior renovation project begins long before the first ladder is leaned against your gutters. Proper preparation is essential to protect your property and ensure that the crew has the necessary access to work efficiently and safely. Homeowners who take the time to prepare their property internally and externally find that the actual construction days pass with significantly less friction.
Clear the Driveway and Secure the Yard
One of the most critical logistical requirements for any construction crew is immediate, unobstructed access to the property. You should plan to relocate all of your vehicles to the street or a neighbor’s driveway at least a day before the project is scheduled to begin. Dedicated local roofing contractors need the entirety of your driveway to safely back in large delivery trucks, stage heavy materials, and position the massive roll-off dumpsters required to catch the thousands of pounds of debris that will be removed from your home. If your cars are trapped in the garage behind a dumpster, you will not be able to leave your property until the project is finished.
Furthermore, you must secure the perimeter of your home. Debris will be falling from the sky, and anything left near the drip line of your house is at risk of being damaged or destroyed.
-
Move all patio furniture, barbecue grills, fire pits, and portable play sets at least fifteen feet away from the house.
-
Relocate fragile potted plants and delicate landscaping features.
-
If you have expensive shrubbery or flower beds directly against the foundation, discuss covering them with heavy-duty tarps or plywood leans with your project manager.
Protect Interior Valuables from Vibrations
Many homeowners are entirely unprepared for the physical impact that exterior construction has on the interior of their home. Full-scale roof replacements involve a tremendous amount of scraping, hammering, and the dropping of heavy material bundles directly onto the wooden framing of your house. These actions send intense, sustained vibrations down through the trusses and into your interior walls.
To prevent accidental damage, you must do an interior sweep of your home. Remove fragile pictures, heavy mirrors, and loosely hanging art from the walls, particularly on the highest floor of your home. Secure any fragile items, such as vases or glass figurines, that sit on unattached shelving units. Additionally, if you use your attic for storage, cover your belongings with drop cloths. The tear-off process will inevitably cause decades of accumulated dust, wood splinters, and roofing granules to fall through the gaps in the decking onto whatever is stored below.
Make Arrangements for Pets and Children
A construction site is a dangerous and chaotic environment, and the sensory overload can be particularly distressing for vulnerable family members. The constant pounding, shouting, and presence of strangers peering through skylights or upstairs windows can cause severe anxiety in pets. Dogs may bark incessantly, and cats may hide or attempt to flee.
-
Consider boarding your pets or arranging for them to stay at a friend’s house for the duration of the tear-off and installation phases.
-
If they must stay home, secure them in a basement or a quiet, interior room with a television or radio playing to drown out the noise.
-
For young children, the disruption to nap schedules and the inability to play in the yard can be highly frustrating. It is often wise to arrange off-site daycare, schedule playdates, or plan a short family getaway during the most intense days of construction.
Understand the Material Delivery and Staging Logistics

Before the actual labor begins, your property will need to receive the thousands of pounds of materials required to complete the job. This delivery phase is often the first tangible sign that the project is underway, and it comes with its own set of logistical challenges that require your attention.
Designate a Safe Drop Zone
Materials typically arrive a day or two before the labor crew is scheduled to show up. This ensures that when the workers arrive, they can immediately begin their tasks without waiting for supply trucks. However, pallets of shingles, rolls of underlayment, and metal flashing take up a massive amount of space. You need to communicate clearly with the supply dispatchers or the project manager representing the roofing companies you are working with to designate a safe and practical drop zone.
Ideally, materials should be placed on a flat, paved surface like your driveway. If they must be placed on the lawn, be aware that the immense weight of these pallets can crush grass and leave deep indentations in the soil, particularly if it has rained recently. Never allow materials to block access to your front door, emergency exits, or municipal utility meters.
Coordinate Timing to Minimize Neighborhood Disruption
The logistics of delivering heavy construction materials involve large flatbed trucks and sometimes heavy-duty forklifts known as Moffetts. These vehicles require wide turning radiuses and significant operational space. In many residential neighborhoods, these transport trucks will temporarily block the street, causing minor traffic delays for your neighbors.
It is highly recommended that you inform your direct neighbors about your impending project. A simple conversation letting them know that large trucks will be in the area and that there will be a temporary increase in noise and traffic goes a long way in maintaining neighborhood harmony. Most local residential roofing projects are completed relatively quickly, but giving your neighbors a heads-up allows them to move their own cars or adjust their schedules to avoid being blocked in.
Verify the Material Order
When the materials are dropped off, take ten minutes to walk outside and physically verify the order. You do not need to be an expert to perform this basic check. Simply cross-reference the labels on the pallets and boxes with your original contract.
-
Check that the shingle or panel color matches your selection exactly.
-
Verify the manufacturer and the product line (e.g., architectural versus 3-tab).
-
Ensure that the accessories, such as the specific grade of synthetic underlayment, ridge vents, and ice-and-water shields, are present.
Catching a dispatch error at this stage is a minor inconvenience that can be fixed with a phone call. Catching an error after the crew has already torn your old materials off and is halfway through installing the wrong color is a catastrophic disaster that can delay your project by weeks.
Brace for the Tear-Off, Noise, and Decking Inspection
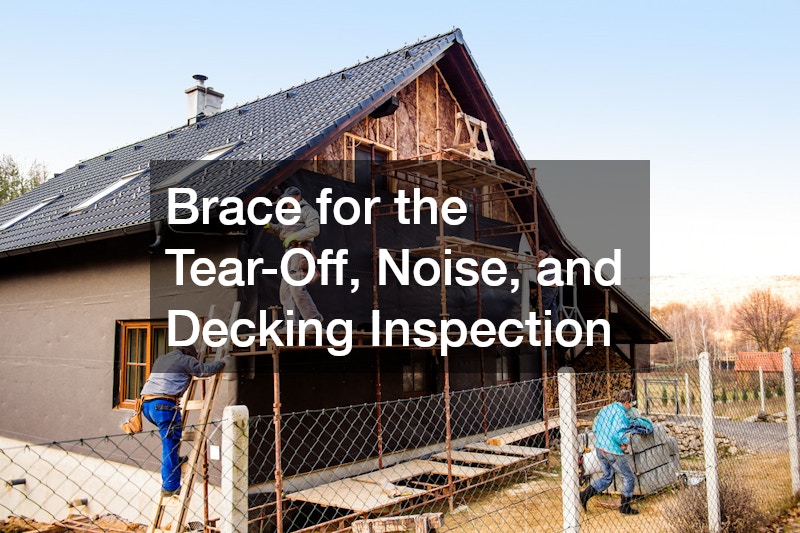
The first day of active construction is universally the most chaotic, the messiest, and the loudest. This is the tear-off phase, where the crew aggressively removes the old, failing system down to the bare wood skeleton of your house. Mentally preparing for this day is crucial for keeping your stress levels manageable.
Expect Significant Noise and Falling Debris
Starting as early as local noise ordinances allow, the crew will arrive, set up their ladders, and begin the arduous process of stripping away the old layers. Armed with specialized tear-off shovels and pry bars, dedicated local roofers will physically rip up shingles, underlayment, and thousands of old nails. The noise of tearing, scraping, and dropping heavy loads of debris into the metal dumpster will be continuous and deafening.
During this phase, you should expect your yard to look like an absolute disaster zone. Despite the crew’s best efforts to toss debris directly into the dumpster or onto strategically placed tarps, the wind will inevitably catch loose granules, stray nails, and pieces of underlayment, scattering them across your lawn. It is vital to stay indoors during this process. If you absolutely must leave the house, make eye contact with the site manager first so they can halt work and ensure you have a safe passage out the door without the risk of debris falling on your head.
Anticipate Structural Surprises Once the Deck is Exposed
Once all the old materials are removed and the bare plywood or oriented strand board (OSB) decking is exposed, the project manager will conduct a critical structural inspection. This is the moment of truth for your home’s framing. They will look closely for rotting wood, mold growth, delaminated plywood, or compromised trusses that were previously hidden beneath the old shingles.
If your home has suffered from poor ventilation or slow, undetected leaks over the years, the decking will likely be compromised. Soft, spongy, or rotting wood cannot hold the nails required to secure a new system. Installing over bad decking is a severe code violation and will void any manufacturer warranties.
Maintain an Emergency Buffer Budget
Because it is impossible to see the condition of the decking until the tear-off is complete, you must plan for financial contingencies. It is highly advisable to keep a contingency fund of roughly 10 to 15 percent above the initial contract price.
If the crew uncovers severe water damage, they will need to immediately halt progress to replace the compromised plywood. In worst-case scenarios involving compromised structural trusses, they may even need to perform emergency roof repairs before any new underlayment can be safely laid down. These structural fixes are almost never included in the base estimate because they are unforeseeable, so having the mental and financial flexibility to approve these necessary change orders will prevent the project from stalling.
Monitor the Application of the Underlayment and Primary Materials

Once the decking has been inspected, repaired, and swept clean, the rebuilding phase begins. This is a highly technical process where multiple layers of protective materials are installed in a specific sequence to create a watertight barrier. Understanding this sequence allows you to monitor the progress and appreciate the engineering behind your new home protection system.
Ensure Proper Weatherproofing is Applied First
The first layer to be installed is the drip edge, a piece of L-shaped metal flashing installed along the eaves to guide water away from the fascia and directly into the gutters. Following this, the crew will apply a self-adhering ice and water shield. This thick, rubberized membrane is crucial in cold climates, as it prevents melting snow from backing up under the shingles and leaking into the walls. It is typically applied along the eaves, in the valleys, and around penetrations like chimneys and vent pipes.
After the ice and water shield is in place, the entire remaining surface of the wood decking is covered with underlayment. While older systems used asphalt-saturated felt paper, modern, high-quality roof installations rely heavily on synthetic underlayment. This synthetic woven material is highly resistant to tearing, repels water exceptionally well, and provides a safer, slip-resistant surface for the crew to walk on during the build.
Observe the Fastening Process for Your Specific Material Type
Once the underlayment is secure, the primary surface materials are applied. The installation techniques vary wildly depending on what you have purchased.
For asphalt shingles, a starter strip must be installed along the eaves to provide the first row of sealant. The crew will then work their way up the slope. You should observe that they are using the correct number of nails per shingle (usually four to six, depending on local wind codes) and that the nails are driven flush with the surface. Underdriven nails will push the shingle above it up, while overdriven nails will tear through the fiberglass matting, rendering the shingle useless against wind uplift.
If you have opted for an upgrade to standing seam metal roofing, the process looks entirely different. You will not see thousands of exposed nails. Instead, the crew will carefully interlock long metal panels, securing them to the decking using specialized concealed fastener clips. These clips allow the massive metal panels to expand and contract with temperature changes throughout the day without warping or tearing the metal. This requires significantly more precision, measuring, and custom cutting on-site compared to traditional materials.
Check the Flashing and Ventilation Setup
The most vulnerable parts of any structure are where planes intersect or where objects protrude through the deck. This is where meticulous flashing work is required. The crew must install new step flashing around the base of chimneys, skylights, and walls.
Furthermore, the longevity of your new system is entirely dependent on proper attic ventilation. The crew should install continuous ridge vents along the peak of the house, which work in tandem with the intake vents under your soffits to create passive airflow. This airflow prevents superheated air from baking your materials from the inside out during the summer and prevents condensation from rotting your new plywood during the winter.
Enforce Strict Cleanup Protocols and Final Inspections

As the final ridge cap is nailed into place and the hammering finally stops, the project is not yet over. The cleanup and inspection phase is arguably one of the most critical steps in the entire process. A sloppy cleanup can leave your property looking like a hazard zone and pose serious safety risks to your family and vehicles long after the crew has departed.
Demand Thorough Debris and Nail Sweeps
Throughout the tear-off and installation phases, thousands of nails, sharp staples, and razor-sharp pieces of metal flashing will have fallen into your yard. A professional crew will conduct continuous, rolling cleanups throughout the day, but the final sweep must be exhaustive.
You should expect the site manager and the crew to meticulously walk your entire property, picking up larger pieces of debris by hand. More importantly, advise your local roofing contractor to use heavy-duty, rolling magnetic sweepers back and forth across your driveway, sidewalks, lawn, and delicate garden beds. These powerful magnets are the only effective way to pull hidden, rusted nails out of thick grass. Do not be afraid to ask them to run the magnet over your driveway a second or third time; a single missed nail can cause a flat tire or a severe foot injury.
Conduct a Post-Installation Walkthrough
Before signing the final check or completion certificate, you must conduct a physical walkthrough with the project manager. While you do not need to climb a ladder yourself, you should walk the perimeter of your home and look up.
-
Visual Alignment: Ensure the courses of shingles or panels look straight and uniform.
-
Flashing Check: Look closely at the chimney and skylights to ensure the metal flashing looks neat, sealed, and securely fastened.
-
Gutter Clearance: Demand that the crew cleans out the gutters. Tear-off debris and excessive loose granules often clog gutters and downspouts during construction.
-
Property Damage: Inspect your landscaping, window screens, siding, and air conditioning units for any accidental damage caused by falling debris or careless ladder placement. If you spot damage, document it immediately before the crew leaves.
Review Warranty Details and Future Maintenance Plans
The final step in the installation process is the paperwork. You must secure both the manufacturer’s warranty for the materials and the contractor’s guarantee for the workmanship in writing. Keep these documents in a safe, easily accessible location.
Take this opportunity to discuss a future maintenance schedule with the project manager. Even the most robust, perfectly installed systems require periodic check-ups. Ask them about the best ways to keep debris off the surface, how often you should have the gutters cleaned, and how to properly address minor issues like future asphalt shingle repair down the line. Attempting to fix a small issue yourself or hiring an uncertified handyman later on can inadvertently void the comprehensive warranty you just paid thousands of dollars to secure.
Conclusion
Navigating a major exterior home renovation does not have to be an exercise in anxiety and frustration. While the process is undeniably noisy, messy, and temporarily disruptive to your daily life, understanding the distinct phases of construction empowers you to handle the chaos with confidence. By recognizing that the chaos is temporary and highly structured, you can shift your focus from worrying about the noise to anticipating the beautiful, secure final result.
The chronological journey is straightforward when broken down: it begins with proactive internal and external preparation, moves through the logistical puzzle of material delivery, endures the loud and messy tear-off phase, transitions into the highly technical application of the new protective layers, and concludes with a strict, exhaustive cleanup. At every step, open, daily communication with your site manager is the absolute key to a smooth project. If you see something you do not understand, or if you are concerned about a specific detail during the build, never hesitate to ask questions.
Ultimately, your home is your most valuable asset, and a new structural installation is one of the most significant investments you will ever make in it. Use the preparation strategies and checklists provided in this guide to get your home, your family, and your property ready for construction day. By knowing what to expect, you ensure that your project is completed safely, efficiently, and to the highest possible standards, leaving you with a secure, beautiful home for decades to come.