How to Lay Sod for Instant Curb Appeal and Long-Term Growth

Highlights:
-
Sod offers instant results: Unlike seed, sod gives a full, green lawn immediately, saving time and reducing early maintenance issues.
-
Proper preparation is key: Clearing the area, testing soil, grading for drainage, and loosening soil ensures strong root establishment and even growth.
-
Choose the right grass for your climate and usage: Cool-season vs. warm-season grasses and factors like sunlight and foot traffic affect long-term lawn success.
-
Follow step-by-step installation: Measuring, laying sod in a staggered pattern, trimming around obstacles, rolling, and watering are essential for healthy establishment.
-
Consistent watering and maintenance matter: New sod requires frequent watering initially, regular mowing, fertilization, and occasional aeration to thrive.
-
Address common issues early: Brown patches, uneven growth, root problems, and pests can be prevented or mitigated with timely intervention.
-
Enhance long-term lawn health: Seasonal care, fertilization, mowing techniques, irrigation, and eco-friendly practices support a vibrant, durable lawn.
Creating a lush, green lawn can completely transform the look of your property. Whether you’re selling your home, upgrading your outdoor space, or simply want a yard that’s the envy of your neighbors, learning how to lay sod properly is key. Unlike seeding, sod gives you an instant lawn, combining visual appeal with long-term benefits for soil health and durability. In this guide, we’ll walk through everything you need to know to get the best results.
Why Choose Sod Over Seed?
Starting a lawn from seed is a traditional method, but sod offers several advantages that can make your life easier and your lawn look better faster. Here’s a deeper look at why sod might be the better option:
- Instant Results: One of the biggest perks of sod is how quickly it transforms your yard. Within hours of installation, you already have a full, green lawn. Unlike seed, which can take weeks to germinate and months to fill in, sod gives your property immediate visual appeal. This is especially important if you’re trying to boost curb appeal before selling or hosting an event.
- Weed Control: Pre-grown sod is typically grown under controlled conditions, meaning it arrives nearly weed-free. Starting a lawn from seed often allows weeds to take hold first, competing with your new grass for nutrients, water, and sunlight. Sod gives you a clean slate, reducing the need for chemical weed control in the early stages.
- Erosion Prevention: Sod immediately stabilizes soil. If you have slopes or areas prone to erosion, laying sod is a smart solution. Unlike seed, which can wash away in rain or require protective coverings, sod locks the soil in place and prevents runoff.
- Less Time Waiting: Growing a lawn from seed requires patience. Seeds germinate slowly, and depending on the grass type, you might wait several weeks before seeing significant coverage. Sod, on the other hand, allows you to enjoy a lush lawn almost immediately, saving you both time and stress.
While sod may cost more upfront, the benefits—instant beauty, fewer weeds, and faster establishment—often outweigh the initial investment, especially for homeowners who want results now rather than later.
Tools and Materials You’ll Need
Having the right tools makes the sod-laying process smoother. Essential items include:
-
Shovel and rake for soil prep
-
Tiller or hoe for loosening soil
-
Garden hose or sprinkler system
-
Sod roller for proper soil contact
-
Fertilizer spreader
-
Sharp utility knife for trimming
Investing in proper tools not only saves time but also reduces mistakes.
Preparing Your Yard: What’s the First Step?
Preparation is the foundation of a successful lawn. Without proper prep, even the best sod can struggle to root and thrive. Here’s how to ensure your yard is ready:
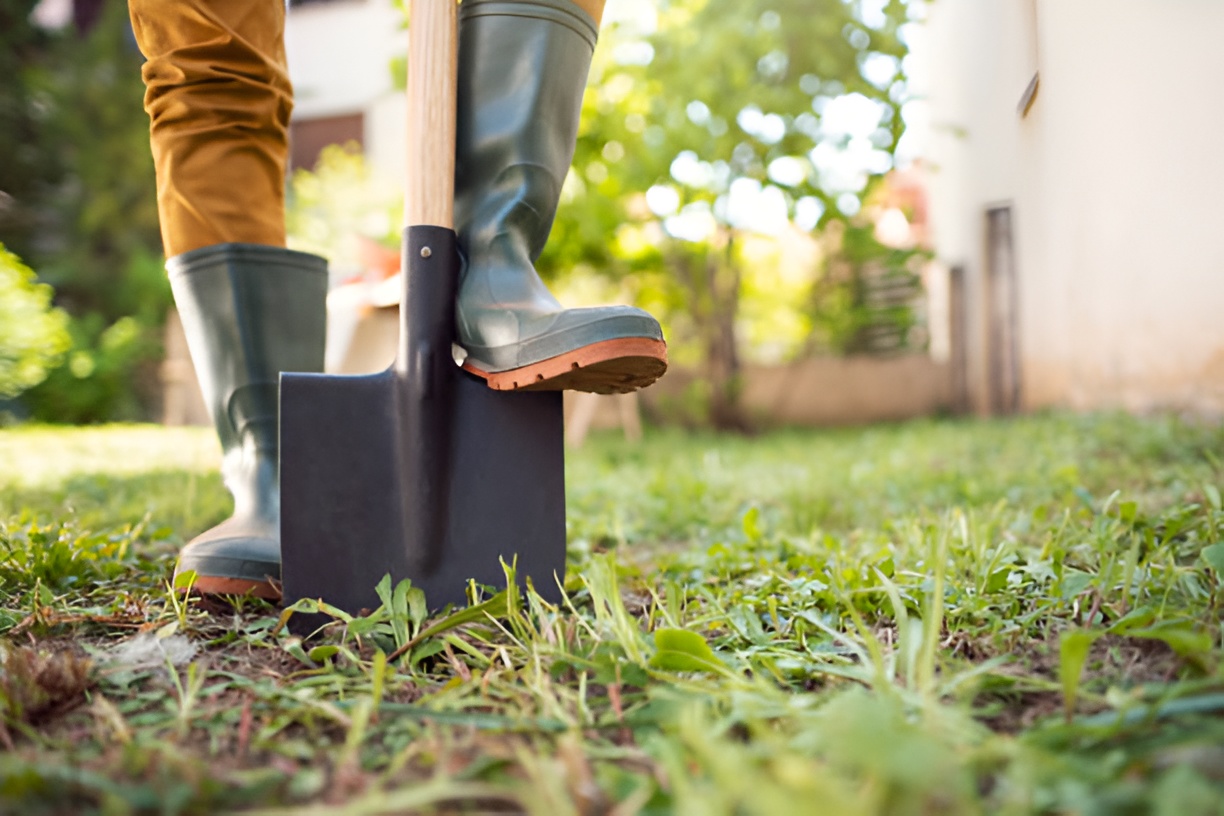
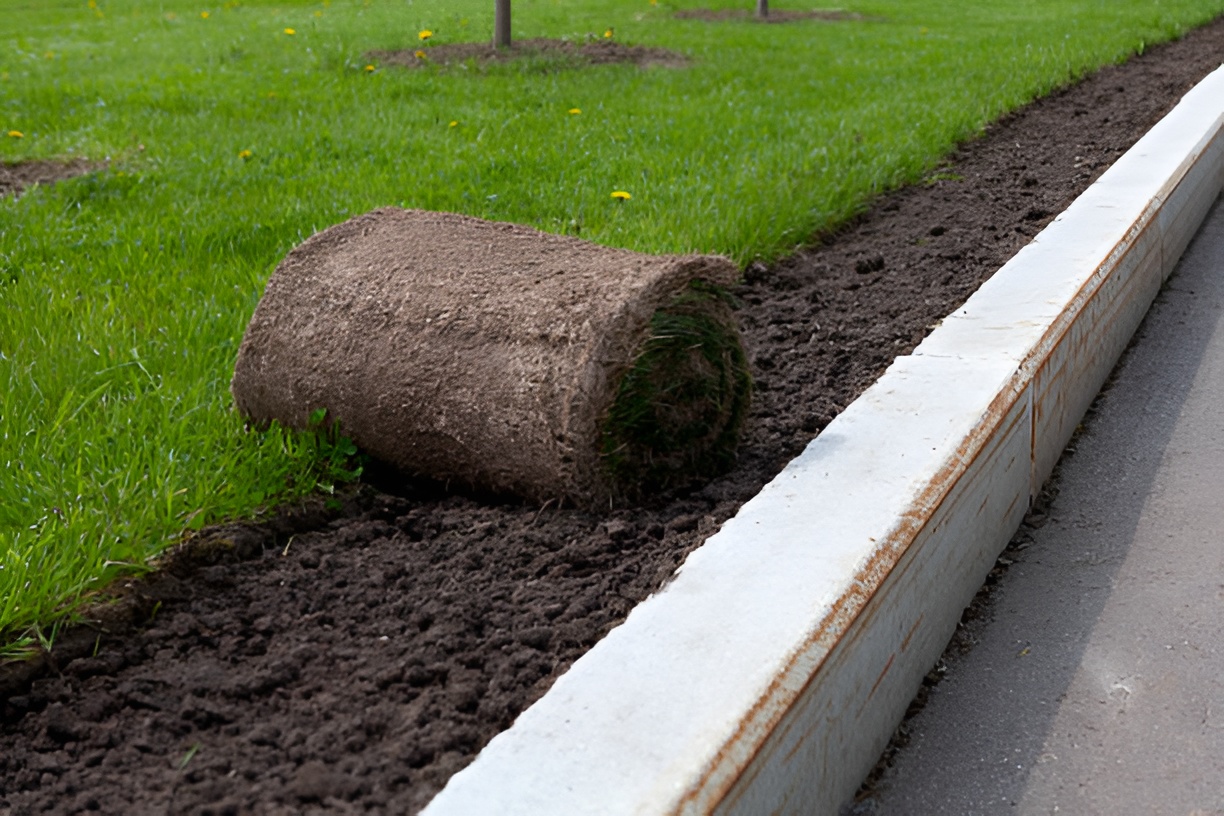
- Clear the Area: Remove all old grass, weeds, rocks, and debris. You want a clean, level surface that won’t obstruct sod roots. In some cases, using a sod cutter or shovel makes this easier, especially for large areas. If you’re doing landscaping during home remodel, clearing the yard at this stage ensures your new lawn integrates seamlessly with other improvements like patios, walkways, or garden beds.
- Test and Adjust the Soil: Healthy soil is essential for strong root growth. Conduct a soil test to determine pH and nutrient levels. Grass prefers a slightly acidic to neutral soil, around 6–7 pH. Based on the results, add lime to raise pH or sulfur to lower it. Mixing in organic compost or starter fertilizer can also improve soil texture and fertility.
- Grade for Drainage: Proper grading ensures water flows away from your house and doesn’t pool in low spots. Even a gentle slope of 1–2% away from foundations is enough to prevent standing water, which can drown grass roots or encourage fungal disease.
- Loosen the Soil: Use a tiller or garden fork to loosen the top 2–3 inches of soil. This improves aeration and makes it easier for sod roots to penetrate. Avoid tilling too deeply, as you don’t want to disturb subsoil layers that could compact later.
- Apply Starter Fertilizer: Before laying sod, spread a slow-release, nitrogen-rich fertilizer. This gives your new grass the nutrients it needs to establish roots quickly. Follow the package instructions carefully—too much fertilizer can burn the grass, while too little may slow growth.
Proper preparation reduces risks like uneven growth, brown patches, or sod failure. Spending time on prep ensures your lawn looks healthy for years.
Choosing the Right Sod for Your Lawn
Not all sod is created equal, and picking the right type can make a huge difference. Consider climate, yard conditions, and how much foot traffic your lawn will see.
Cool-Season vs. Warm-Season Grass
- Cool-Season Grass: These grasses thrive in northern regions where summers are mild. Common types include Kentucky bluegrass, fescue, and perennial ryegrass. Cool-season grasses grow actively in spring and fall and tend to stay green in moderate temperatures.
- Warm-Season Grass: Suited for southern regions with hot summers, varieties like Bermuda, Zoysia, and St. Augustine thrive when temperatures are high. They’re drought-tolerant and resilient but may go dormant in cooler months.
Consider Sunlight and Traffic
-
Full Sun Areas: Grasses like Bermuda or Kentucky bluegrass perform well in direct sunlight and tolerate dry spells.
-
Shaded Areas: Fescue and St. Augustine are more shade-tolerant, ideal under trees or near tall structures.
-
Heavy Foot Traffic: For lawns that see frequent activity, choose durable varieties such as tall fescue or Bermuda. These grasses recover quickly from wear and tear.
Local sod suppliers can provide guidance on which grass types are most suitable for your specific region and yard conditions.
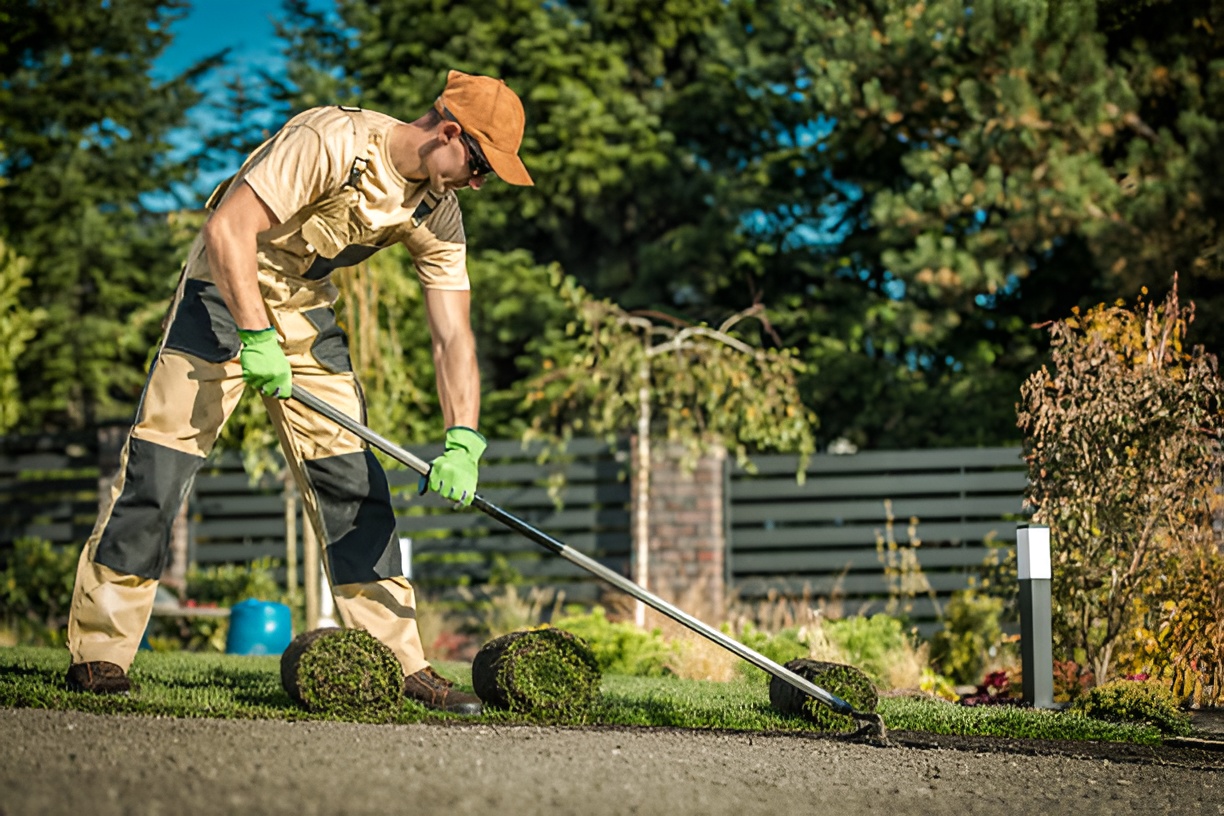
How to Lay Sod Step by Step
Once your yard is prepped and you’ve chosen your sod, it’s time to install it. A careful, systematic approach ensures a uniform, healthy lawn.
Step 1: Measure and Plan
Calculate the square footage of your lawn to determine how much sod you’ll need. Order a little extra to account for cutting around edges and curves. Planning the layout helps avoid small, awkward pieces that are hard to fit.
Step 2: Start Along a Straight Edge
Always begin along a straight boundary like a driveway, sidewalk, or fence line. This provides a reference for laying rows and ensures a neat appearance.
Step 3: Lay the First Row
Place sod pieces tightly together, making sure edges touch without overlapping. Stagger seams in a brick-like pattern to minimize erosion and create a seamless look. Avoid leaving gaps, as they can dry out quickly and develop bare patches.
Step 4: Cut Around Obstacles
Trim sod around trees, flower beds, or pathways using a sharp utility knife. Cut carefully to fit edges snugly, ensuring a continuous lawn without overlapping pieces.
Step 5: Roll the Lawn
Use a lawn roller to press the sod firmly into contact with the soil. Rolling removes air pockets, improves root-to-soil contact, and ensures the sod establishes quickly.
Step 6: Water Immediately
Sod needs moisture to establish roots. Water deeply within 30 minutes of installation, soaking the soil beneath the sod but avoiding puddles. Keep the soil consistently moist—not soggy—for the first couple of weeks.
How Often Should You Water New Sod?
Proper watering is critical during the first month after installation:
-
First 2 Weeks: Water daily, or more often in hot, dry weather. The soil should be moist at least a few inches below the surface.
-
Weeks 3–4: Reduce watering to every other day. Check that the sod has rooted by gently lifting a corner—resistance indicates roots are establishing.
-
After 1 Month: Transition to a regular lawn watering schedule, typically 1–1.5 inches per week, either through rainfall or irrigation.
Avoid letting new sod dry out, as this can lead to brown patches and uneven growth.
Fertilizing and Maintaining Your New Lawn
After your sod is established, ongoing maintenance keeps it healthy and attractive:
-
First Fertilization: Apply a balanced fertilizer 3–4 weeks after installation to support strong root development.
-
Mowing: Wait until grass reaches 3–4 inches before mowing. Cut to a height of 2–3 inches and avoid removing more than one-third of the blade at a time.
-
Weed Control: Hand-pull any weeds during the first month. Avoid chemical weed killers until roots are well established.
-
Aeration: Aerate your lawn once or twice a year to improve soil oxygen flow, water penetration, and nutrient absorption.
Consistent maintenance now pays off with a lush, long-lasting lawn.
Common Problems and How to Avoid Them
Even perfectly installed sod can face challenges. Here are common issues and how to prevent them:
- Brown Patches: Often caused by inconsistent watering or fungal disease. Adjust your watering schedule, check for pests, and improve airflow around your lawn by trimming nearby shrubs.
- Uneven Growth: Poor soil preparation, gaps between sod pieces, or uneven grading can lead to patchy lawns. Fill gaps promptly, level the soil, and overseed bare areas if necessary.
- Root Problems: Sod that dries out or is not properly rolled can struggle to root. Roll the sod after installation and maintain consistent moisture until roots are strong.
- Insects or Disease: Monitor for signs of grubs, fungal spots, or other pests. Early intervention is key to preventing widespread damage.
Enhancing Curb Appeal With Your Lawn
A well-maintained, lush lawn is one of the simplest and most effective ways to boost both your property’s value and its overall visual appeal. Sod gives you instant results, creating a vibrant, uniform green surface that immediately catches the eye. A healthy lawn also sets the stage for other design elements, providing a polished backdrop for flower beds, shrubs, garden borders, or decorative mulch.
In many curb appeal improvement projects, the lawn is the foundation that ties the entire front yard together. Even small details, like edging the lawn along sidewalks or driveways, can dramatically improve the perception of care and attention to detail.
Here are some actionable ways to enhance curb appeal with your new sod:
-
Edge and define your lawn: Create clean, sharp borders along driveways, walkways, and garden beds to give your yard a professional, manicured look.
-
Incorporate colorful flower beds: Plant seasonal or perennial flowers along borders or near entrances to complement the green of your sod.
-
Add shrubs and low-maintenance plants: These provide structure and texture, breaking up large expanses of grass and adding visual interest.
-
Mulch for a polished appearance: Fresh mulch in flower beds and around trees helps retain moisture, suppress weeds, and create a neat, finished look.
-
Install lighting to highlight features: Solar or low-voltage lights along pathways, around trees, or near garden features can dramatically improve nighttime curb appeal.
-
Keep the lawn healthy and green: Regular mowing, watering, and fertilizing ensures your sod looks its best all year round.
Remember, your lawn is often the first thing visitors and potential buyers notice. By investing time and care into laying and maintaining sod, you not only achieve instant beauty but also create a welcoming, lasting impression that elevates your entire home.
Seasonal Considerations for Laying Sod
The time of year can affect sod establishment and growth.
-
Spring and Fall: Ideal for cool-season grasses. Temperatures are moderate, and rainfall is usually sufficient.
-
Summer: Warm-season sod thrives, but frequent watering is essential. Avoid extreme heat during installation.
-
Winter: Sod establishment is slower in cold climates. If possible, schedule installation during active growing seasons.
Understanding seasonal impacts ensures your lawn develops strong roots and vibrant color.
How to Transition From Old Lawn to New Sod
If replacing an old lawn, the process requires extra care:
-
Remove all old grass and weeds.
-
Test soil and amend as necessary.
-
Grade and level the area.
-
Lay sod tightly together and roll to ensure contact.
For areas with poor drainage or compacted soil, consider adding a layer of topsoil to improve root growth.
Long-Term Growth Strategies
Sod is just the beginning. To ensure a healthy, thriving lawn over the years, consider these strategies:
-
Regular Fertilization: Follow a seasonal schedule for your grass type.
-
Mowing Techniques: Keep mower blades sharp and avoid scalping.
-
Irrigation Systems: Automated systems can help maintain consistent watering.
-
Pest Control: Monitor for grubs, insects, or fungal diseases regularly.
By integrating these practices, your lawn remains healthy, lush, and visually appealing.
Eco-Friendly Lawn Tips
Sustainable lawn care benefits both your property and the environment:
-
Choose drought-resistant grass varieties.
-
Use organic fertilizers to reduce chemical runoff.
-
Collect rainwater for irrigation.
-
Limit excessive mowing to encourage deep root growth.
Eco-friendly practices save resources while supporting long-term lawn health.
Closing Thoughts
Learning how to lay sod properly combines preparation, careful installation, and ongoing maintenance. From instant curb appeal to long-term growth, sod offers homeowners an efficient way to transform their yards. By selecting the right grass, preparing your soil, and implementing proper watering and fertilization routines, your lawn will not only look beautiful immediately but also thrive for years to come. Whether you’re upgrading for a remodel, improving curb appeal, or simply enjoying your outdoor space, sod provides a reliable foundation for a healthy, vibrant lawn.